 In a hosting environment such as ours, modifying the main php.ini file isn’t a viable option for changing default PHP settings. Don’t despair, however. In their infinite wisdom and incredible foresight, the developers of PHP built in a way for you to change certain directives locally using a file named .user.ini. Here, I’ll show you how to create your own.
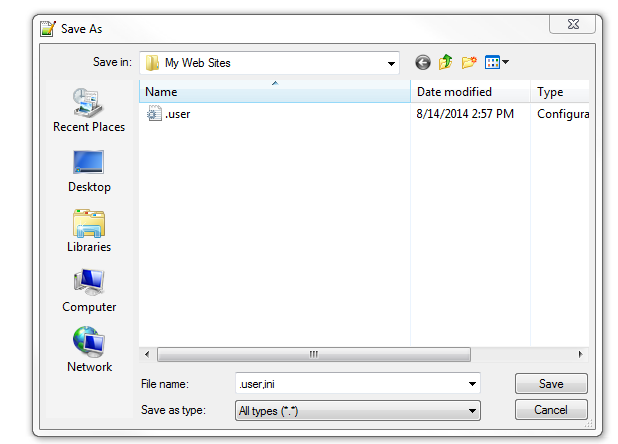
You’ll need to open up a text editor (Notepad++ is my favorite) and save a new file called “.user.ini.” Make sure to save it as “All types.”
After you’ve saved it, you’re ready to create your very own local configuration file. Since WordPress is probably the most recognizable PHP application, to make it personal I’ll focus on those configuration directives commonly modified to optimize WordPress performance.
The first is the memory_limit directive. This directive sets the maximum amount of memory a PHP script is allowed to use. Setting a limit ensures that a inefficient script doesn’t use up all the memory allocated to your site. It’s measured in bytes, but you can specify megabytes by adding “M” to the end. For instance, if you want to set the limit to 500 MB, you’d enter the following in your .user.ini file:
memory_limit = "500M"
By the way, if you want to check what the default values are for some of these configuration directives in the main php.ini file, create a file called phpinfo.php and paste this code into it:
<? phpinfo() ?>
Upload the file to your site’s root directory. To run the script, go to http://yourdomain.com/phpinfo.php. It will display all the configuration information about the PHP build you’re running, including the exact version number, as well as some information about the server it’s running on. You can also compare your local .user.ini directive values to the default php.ini values by checking the “Local Value” and “Master Value” columns under the various section headings.
Well then, let’s move on to modifying some more configuration directives for your WordPress installation. The second directive you’ll change in your .user.ini file is upload_max_filesize. It sets the maximum size allowed for files uploaded through your PHP application. The size is measured in bytes, but as with memory_limit, you can use shorthand (e.g. “M” for megabytes and “K” for kilobytes). This directive is important to change, because if the limit is too low, you won’t be able to install or update some themes and plugins. Enter this line in your .user.ini file:
upload_max_filesize = “30M”
You can increase it beyond 30M if you like. Our default php.ini setting is “2M”.
Next, we’ll modify the post_max_size directive. This sets the maximum amount of data an HTTP POST request can contain. We need to set it to a size equal to or larger than upload_max_filesize. Enter this line in your .user.ini file:
post_max_size = “35M”
The next two directives we’ll modify are max_execution_time and max_input_time. Modifying these directives can help if you’re having timeout issues in your PHP application. Respectively, they modify the maximum amount of time a script is allowed to run before the parser terminates it, and the maximum amount of time a script is allowed to parse input data (e.g., HTTP POST and GET requests). The time is measured in seconds for both directives. Paste the following lines into your .user.ini file:
max_execution_time = 600

max_input_time = 600
You’re almost done. At this point, your .user.ini file should look like this:
memory_limit = "500M"

 upload_max_filesize = "30M"

 post_max_size = "35M"

 max_execution_time = 600

 max_input_time = 600
If your file matches the above, congratulations! You’ve just created a brand spanking new .user.ini file. Buy yourself something nice. If your file doesn’t match, iterate through the instructions until it does.
For the .user.ini file to work its magic, you need to upload it to your site’s root directory. The easiest way, in my view at least, is to use an FTP client like FileZilla. It’s free and open-source (just like PHP). You can download FileZilla here. Once you’ve installed FileZilla, review this Knowledge Base article for instructions on configuring it to connect to your site. And if you need help with using it, the FileZilla Project has detailed documentation here.
So, you’ve uploaded your .user.ini file to your root directory. Now, you’ll need to restart your site for it to recognize that there’s a .user.ini file in there. Here’s how to do that:
Log in to your Control Panel.
Click on the “Sites” link in the top menu bar.
Click “Manage” next to the domain name for the account you’ve uploaded the .user.ini file to.
On the right hand side, you’ll see a box labeled “Site Tools” with two big orange buttons in it.
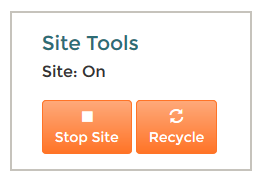
Click the “Stop Site” button. Once you see the “Stop success” message in the box, click the “Start Site” button.

After you see the “Start success” message appear, go check out the phpinfo.php file you uploaded at http://yourdomain.com/phpinfo.php again and look at the “Local Value” column to see that the changes were applied. It may take a couple minutes to reflect. If it seems like it’s taking a really long time, be sure you’ve cleared your browser’s cache and try reloading. If it’s been ages (and by ages, I mean what seem to be hours) and it’s still not working, open a support ticket so we can investigate.
Just so you know, there’s a lot more configuration directives you can modify in your new .user.ini file. There’s a long list on the PHP documentation site. Check out the “Changeable” column on the right side of the “Configuration Options” column. The directives you can modify locally will have “PHP_INI_PERDIR“, “PHP_INI_USER” or “PHP_INI_ALL” in that column. Anything else can only be set in the main php.ini file.
Enjoy your new, personalized PHP configuration!
When you say root directory, do you mean the directory where wordPress is installed or further up the file structure? I have shared hosting and do not have very little access to folders more than 1 up from my wordpress intall. . Thank you.
Root meaning root for the site/domain. If your WordPress installation is in a subdirectory the settings will be inherited from the root. Bear in mind that this article pertains to our platform, so your results may vary.
Hi, Tasha Shermer,
Thanks for such article . This technique worked for me. I search a lot of place but they guide me to change the php.ini file. but .user.ini technique worked. Thanks a lot . Thank you very much. Please keep share your knowledge. I used this technique for my moodle project..
You’re welcome 😉
Terrific tutorial, thank you! Question… I already have a php.ini file although my hosting wants me to switch to user.ini. Will building the user.ini file as you’ve described below meet this expectation? My issue has been internal 500 errors since upgrading to php 5.5 (although php 5.3 does not initiate this error).
Super tutorial! I have been trying to figuring this out last half day, until I stumbled upons this one! Great!!! Thanks
What if my computer won;t save a file as “All types”?
You should check online to see if there is a resolution.